If you’re writing blog posts regularly, you already know how much effort goes into just getting started. You open a doc, figure out what structure to use, decide on tone, try to remember what formatting you used last time, then copy links from your last article or dig through your sitemap to do internal linking manually.
It’s tedious. It’s inconsistent. And it eats up more time than the actual writing.
Now imagine you could skip all of that with one click.
That’s what Presets in Contentpen are for. They help you save your ideal article setup, including voice, structure, formatting, and linking, so you never have to start from scratch again.
Whether you’re blogging manually or already using Contentpen, this guide will show you how presets cut hours from your workflow, keep your content consistent, and help you publish faster with less friction.

Key Takeaways
- Presets eliminate repetitive work by saving your preferred content settings, including tone, formatting, structure, and linking, in one reusable template.
- Manual blogging is time-consuming, error-prone, and inconsistent. Presets help streamline your workflow and maintain brand standards.
- Contentpen lets you create multiple presets, so you can tailor your setup for different content types, audiences, and campaign goals.
- Using presets saves hours each week, making it easier to scale high-quality content production without sacrificing speed or consistency.
What are presets in Contentpen?
Presets are reusable content blueprints that let you predefine exactly how your articles should be written and structured inside Contentpen.
Think of them as your saved writing formula. Instead of selecting the same tone, adjusting formatting, picking section types, or setting up internal links every time, you define it once and apply it instantly to any new article.
Each preset can include:
- Tone of voice and audience
- Preferred formatting (bold, quotes, tables, heading styles)
- Article structure, length, and optional sections (FAQs, takeaways, etc.)
- Intro style (custom, emotional, statistical, etc.)
- Internal linking rules using your sitemap
- External linking preferences (include or exclude specific domains)
Once set, you or your team can apply a preset with a single click, so every blog starts with your exact preferences already in place.
Why presets matter (especially if you’re blogging manually)
If you’re still doing everything by hand, writing in Docs, formatting manually, and trying to keep every post consistent, you’re spending hours on tasks that can be automated.
Presets eliminate that friction. They turn your best practices into repeatable systems.
Here’s why they’re worth using, no matter how you currently blog:
- Save time: Stop redoing the same setup for every article.
- Ensure consistency: Every article follows the same tone, structure, and standards, whether you or a team member writes it.
- Scale without stress: As your content volume grows, presets make it easy to maintain quality at speed.
- Reduce manual errors: Never forget a formatting rule, section type, or linking guideline again.
- Reclaim your creative energy: With the busywork handled, you can focus on what actually matters, the content.
If you’re already using Contentpen, presets are the fastest way to unlock serious workflow gains. And if you’re blogging manually today, this is the feature that makes switching worth it.
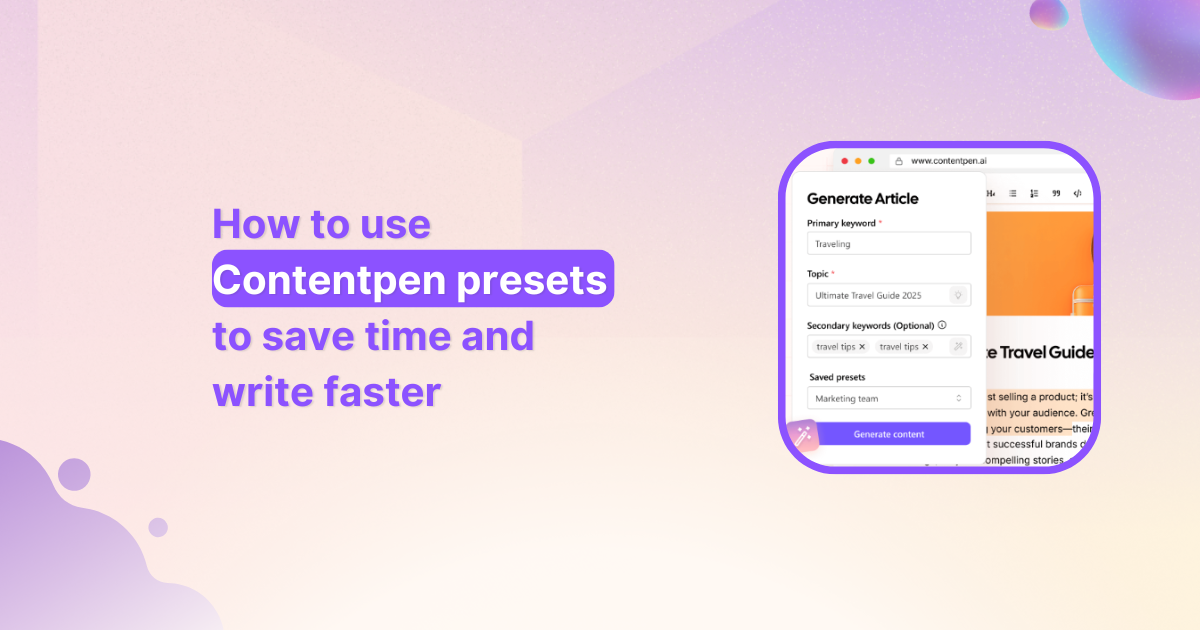
How to use Contentpen presets: 7 simple steps
Setting up your first preset in Contentpen is simple, and once it’s done, you’ll never have to manually configure your content setup again. Follow these easy steps to create a preset that fits your writing style, structure, and content goals.

1. Sign in or create your account
To get started, log in to your Contentpen account. If you’re new, sign up and start your free trial – and enjoy a 30% discount on annual plans while it lasts.
Presets are available to all users and can be created as soon as you access your workspace.
2. Navigate to the Presets section
In the left-hand sidebar, go to Assets → Presets. If you haven’t created any presets, you’ll see a message inviting you to start.
Click Create New Preset to begin setting yours up.

3. Set your article style
In this step, you’ll define how your content should sound, the tone, audience, and point of view. These settings help ensure that every article reflects your brand voice and connects with the right readers.
- Tone of voice: Choose from predefined options like professional, conversational, formal, authoritative, educational, casual, etc.
- Target audience: Select the type of reader you’re writing for, such as marketers, founders, agency owners, startups, enterprises, etc.
- Point of view: Choose first person (I/we), second person (you), third person (they/it), or let Contentpen decide automatically.

4. Choose formatting preferences
Next, decide how your content should appear visually. These formatting rules help standardize your content and reduce post-editing work.
Toggle on or off the following elements:
- Bold: Automatically bold key phrases for emphasis
- Italic: Subtly highlight certain ideas
- Quotes: Include callouts or tips
- Tables: Display structured data clearly
- Lists: Use bullet points or numbers where needed
You can also choose your heading capitalization: Title Case or sentence case.

5. Define article structure
Now, outline how your articles should be built, from length to sections and intro hooks.
Article size: Select from:
- Small (3–5 headings)
- Medium (5–8 headings)
- Large (8–12 main sections)
- Very Large (12–15 sections)
Intro hook (optional): Choose how your articles should begin. Options include:
- Custom
- Question
- Statistic
- Quote
- Anecdote
- Emotional opener
Optional sections: Enable or disable these:
- Key Takeaways (summary at the top)
- Conclusion
- FAQs
Media options: Choose whether to include:
- 1 featured image
- 3 – 4 in-article images
This ensures every article is pre-structured the way you want, without needing to reformat later.

6. Set up internal and external linking
Good linking boosts SEO and keeps readers engaged. Here’s how you can automate it inside your preset:
Internal linking:
- Website URL: Enter your main site – Contentpen will auto-detect your sitemap. Or,
- Add Sitemap: Manually paste your sitemap URL if needed.
- Filter/Exclude Paths: Include only blog pages (e.g., /blog/*) and exclude non-content paths (e.g., /admin/).
- Enable auto-knowledge linking: Let Contentpen pull internal links directly from your sitemap into articles.
Also read: How to add a sitemap in Contentpen?
External linking:
- Auto-linking toggle: Automatically add outbound links to trusted sources in your niche.
- Included domains: Whitelist reliable sources you’d like linked in articles.
- Excluded domains: Prevent links to competitors or irrelevant sites.

7. Save your preset
Once everything is configured, click Save Preset.
It will now appear in your Presets list and can be instantly applied to any future article, so your content creation starts with all the right settings, every time.
Why use Contentpen for content creation?
Contentpen isn’t just another AI writing tool, it’s built for content marketers and teams who care about speed, structure, and quality at scale.
Unlike traditional writing tools that give you a blank page and generic output, Contentpen is designed to help you plan, structure, and publish better content faster. With features like:
- Smart article presets: Save and apply your favorite writing configurations in one click
- Content types for every goal: From how-to guides to SEO listicles, choose from multiple blog styles
- Built-in linking and formatting: Automate internal/external links, bolding, quotes, and layout styles
- Visual-ready content: Add featured and in-article images without using design tools
- Collaborative workspace: Perfect for agencies, marketing teams, and solo creators scaling their output
If you’re still spending hours formatting articles, aligning tone, or manually linking pages, Contentpen simplifies all of it in minutes. It’s built to help you do less busywork and publish content that performs.
Bottom line: How to use presets in Contentpen
Presets in Contentpen aren’t just a convenience, they’re a content creation advantage. By eliminating repetitive setup tasks, ensuring brand consistency, and speeding up your workflow, presets help you publish more high-quality content in less time.
Whether you’re a solo creator looking to streamline your process or a content team aiming for scale, presets take the guesswork out of every new article, so you can write with focus and publish with confidence.
FAQs about using presets in Contentpen
What exactly does a Contentpen preset include?
A preset includes all your preferred writing configurations, such as tone of voice, target audience, formatting style, article structure, intro type, internal linking rules, and external link preferences. Once saved, it can be applied to any future article in one click.
Can I create multiple presets for different content types?
Yes, you can create as many presets as you need. For example, one for SEO how-to guides, another for founder blogs, and a separate one for product announcements, each with its own tone, length, and structure.
Can I edit or update a preset after I’ve created it?
Yes, you can go back to any saved preset, make changes, and update it to match your evolving content needs. You can also duplicate a preset to create a variation without starting over.
Do I need to use a preset every time I create an article?
No, using a preset is optional. If you prefer to customize settings manually for a specific post, you can skip the preset and configure everything on the spot. Presets are there to speed things up when you need them.
How do presets help with brand consistency?
Presets standardize tone, structure, and formatting across every article, so whether you’re writing solo or with a team, your content always looks and sounds on-brand.
Is using presets better than writing manually in Google Docs or a CMS?
Yes, significantly. Manual workflows often involve repeating setup steps, copying old formats, and manually linking. Contentpen presets eliminate that repetition, reduce human error, and streamline your writing process, so you can focus on creating content, not configuring it.
Leave a Reply