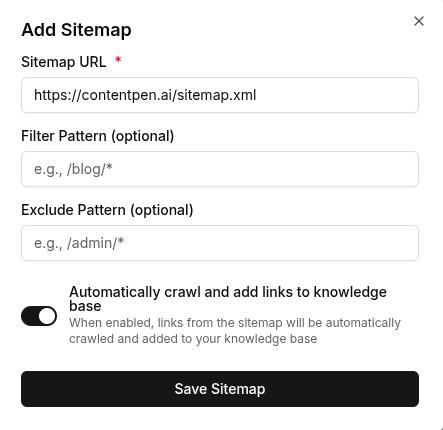
A sitemap is an XML file that lists your site’s important URLs, such as pages, videos, and other files. It helps search engines like Google discover and index your content more efficiently. But its usefulness doesn’t stop at search engines.
Sitemaps also allow tools like Contentpen to automate internal linking for your blogs and articles. The best news? This process is only a one-time effort and doesn’t require manual tweaking as you add content.
Curious to learn more? Let’s check how to add a sitemap in Contentpen with all methods considered.
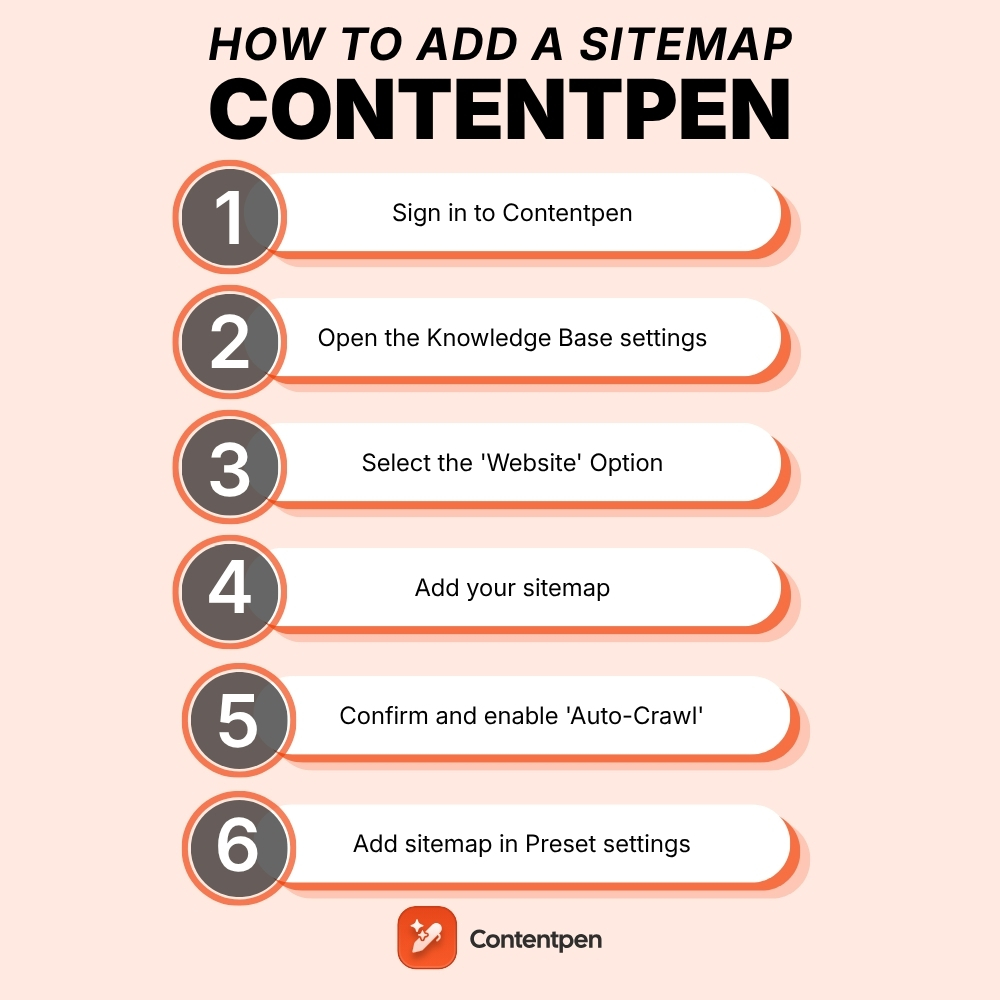
2 ways to add a sitemap in Contentpen
There are two ways in which you can enter your sitemap in our AI writing tool:
- Through ‘Knowledge Base’ settings
- Through ‘Presets’ options
Let’s review them in more detail.
Using the Knowledge Base settings
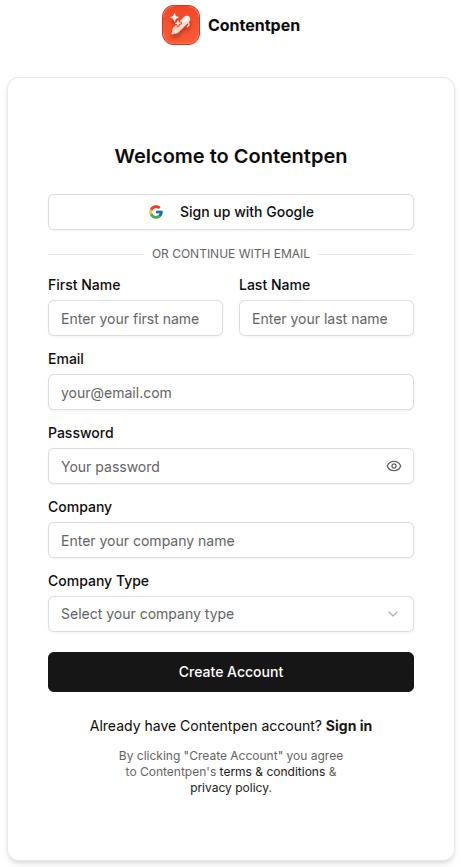
Step 1: Sign in or create an account on Contentpen to access the main dashboard.
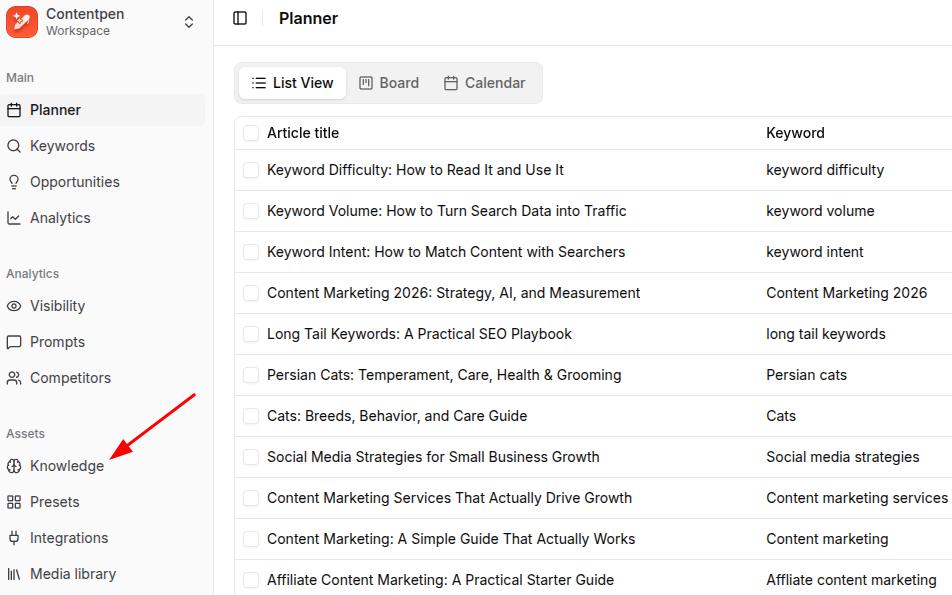
Step 2: From there on, see the ‘Knowledge’ button from the left-side navbar and click on it.
Step 3: Then, click the ‘Website’ option to proceed with setting up your sitemap in Contentpen.
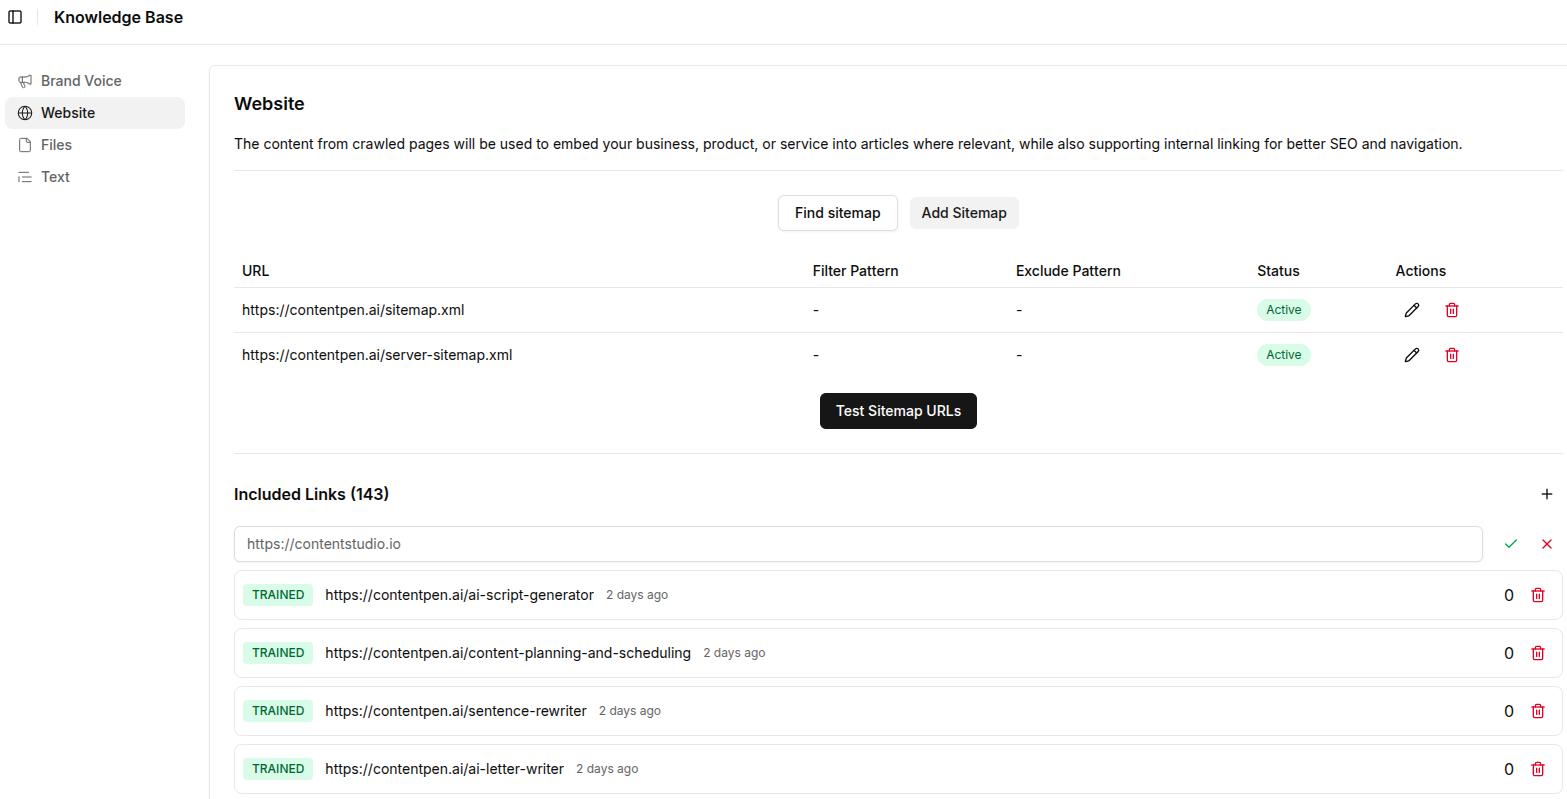
On this screen, you see two buttons, ‘Find Sitemap’ and ‘Add Sitemap.’
Usually, sitemaps follow a familiar pattern:
https://yoursite.com/sitemap.xml
Or
https://yoursite.com/server-sitemap.xml
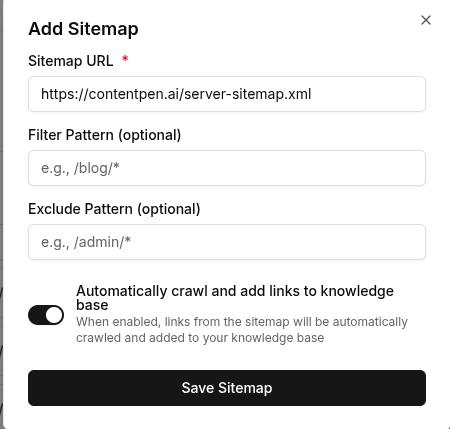
Step 4: If you know yours, click ‘Add Sitemap’ to proceed with the XML sitemap integration inside Contentpen.
On this screen, you can use the Filter and Exclude Pattern (optional) fields as well. In simpler terms, it means:
- Filter Pattern – To only include selected categories or pages you prefer to show. For instance, ‘/blog/’.
- Exclude Pattern – To leave out specific pages you don’t want found or crawled from the sitemap. For example, ‘/admin/’.
Also read: Search engine basics: How they work and why they matter.
Step 5: Alternatively, if you don’t know your sitemap or want this process to be completely automated, then use the ‘Find Sitemap’ button.

At this screen, enter your domain and hit the ‘Find My Sitemap’ button to let Contentpen automatically discover your XML file(s).
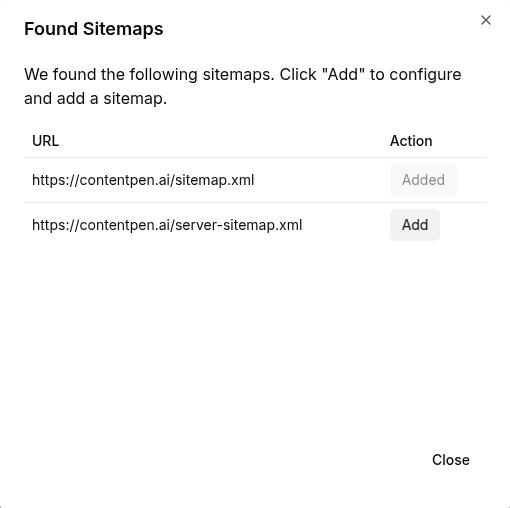
Step 6: Once discovered, click ‘Add’ to include your sitemap in Contentpen and proceed with the same configuration steps as shown earlier in step 4.
Finally, you can test your added sitemap using the ‘Test Sitemap URLs ‘ button.
Note: Keep the ‘Automatically crawl and add links to knowledge base’ slider on to help Contentpen learn contextual details from your pages. This will ensure smooth internal linking and better on-brand content for your blogs.
Using the Presets settings
Step 1: For the second method of adding your sitemap to Contentpen, go to the ‘Presets’ options from the main dashboard.
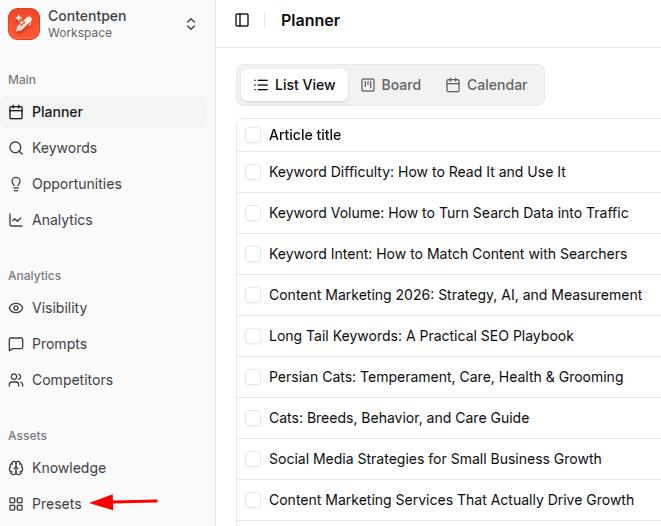
Then, click on the ‘Create New Preset’ button to proceed.
Step 2: Once you are at the preset settings, set up your ‘Style’, ‘Formatting’, ‘Structure’, and ‘Media’ details, as shown in the ‘How to use Contentpen presets’ blog.
Step 3: After all the other preset options are done, go down to the final ‘Linking’ option.
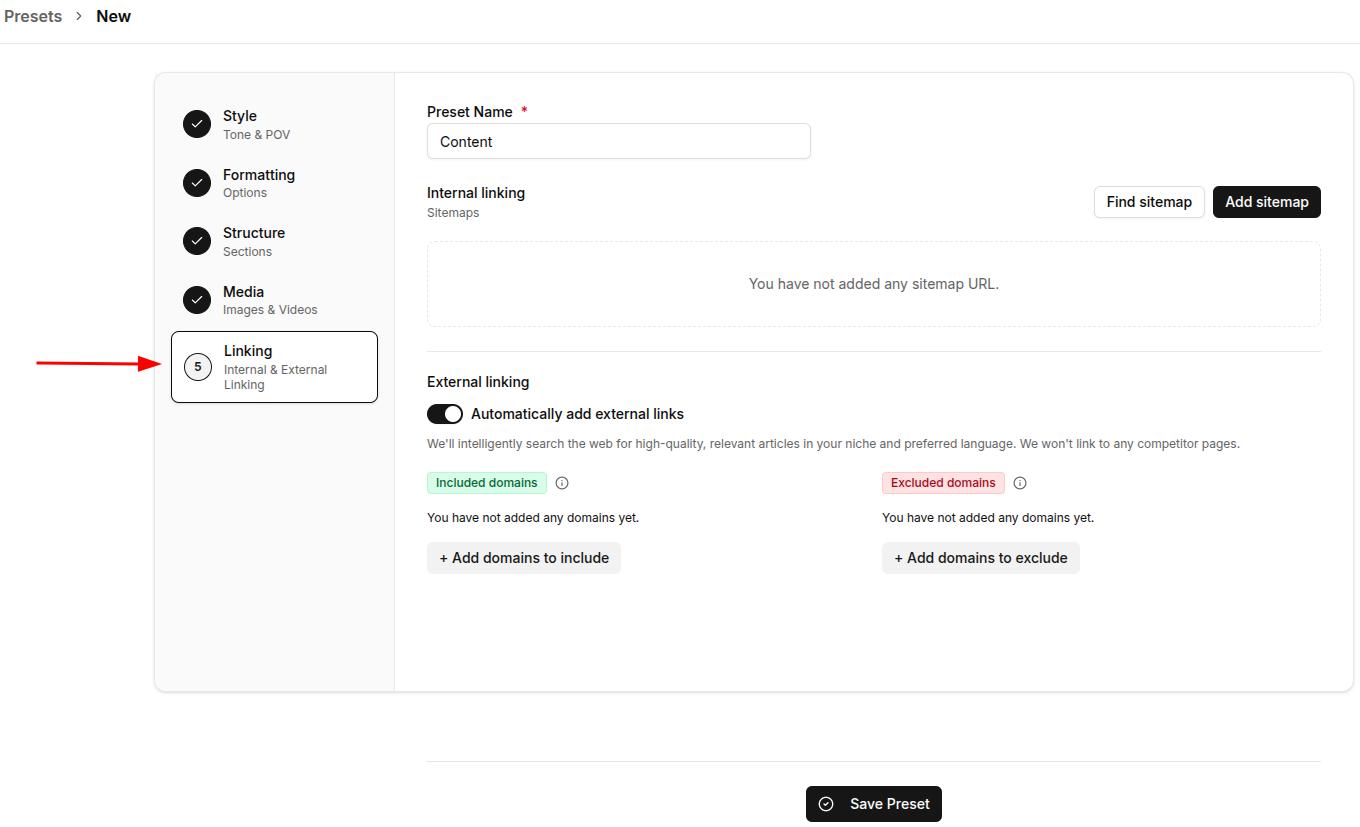
Here you will find the same ‘Find sitemap’ and ‘Add sitemap’ buttons as in the previous method.
Repeat step 4, or steps 5 and 6 from the Knowledge Base method to achieve a successful Contentpen sitemap setup.
Note: You can toggle external links on or off from this screen. Use this feature to add or exclude domains that you don’t want as outbound sources in your content to strengthen your link profile and automate internal and external linking.
Final thoughts
Adding a sitemap in our SEO platform is simple, quick, and designed to make internal linking easier. Whether you prefer to let the system handle it automatically or want to add or adjust it manually, the process is smooth and flexible.
Plus, with powerful customization options like exclude and filter patterns, you stay in full control of what shows up in your content.
Once your sitemap is set up, you can fully automate your linking and content structure, saving hours on manual SEO work.
From outline to publish-ready content that fills them
Structured
Consistent
SEO-aligned
Fast
Frequently asked questions
Yes. If your website has more than one sitemap (e.g., a separate one for blog posts and products), you can add each one individually through the Knowledge Base or Presets settings.
Yes. Once crawled, your sitemap helps Contentpen build a knowledge base of your existing content, which it uses to generate more contextually relevant and on-brand articles.
Yes. The “Filter pattern” feature lets you specify which pages or categories you want to include, giving you complete control of your internal links.
If you’ve enabled the automated feature, then yes. Your sitemap will update in real time as you publish new content.
In that case, you’ll need to update your sitemap settings with the new URL. You can either fetch it automatically again or manually paste the new sitemap.
Not at all. Whether you’re using the automated or manual method, the process is beginner-friendly and takes just a few clicks.